Sophisticated, crispy, light and flaky homemade Italian cocoa cannoli shells are new on my blog.
I have to say it – I am obsessed with making cannoli right now. They are soo easy to make and taste much better than shells you can but in a shop.
So, here I am sharing my new recipe for homemade Italian cocoa cannoli shells. In this new homemade Italian cocoa cannoli shells, you can expect a little bit of bitterness from cocoa which pairs beautifully with sweetness of powdered sugar.
How to make homemade Italian cocoa cannoli shells?
Making Italian cannoli will take some time. The good thing is that you can make pastry dough in advance and fry it the next day. To make pastry dough you need to mix all ingredients together and knead the dough until it will get to unified consistency.
The next step is very important, you need to keep cutting the pastry dough with the knife and kneading it together for about 10 minutes. It will help to create these lovely and delicious crispy air pockets on the cannoli. Please do not miss this step. Then you need to leave the pastry dough in the fridge to rest.
When it comes to shaping cannoli, you can make as big cannoli as you wish depending on the size on the metal tubes. Try to roll your cannoli pastry quite thin so the shells are crunchy and crispy. Oil temperature is vital, it should be 175C. If the Pay attention to sealing cannoli shells properly so they do not open up while frying.
What do homemade Italian cocoa cannoli shells taste like?
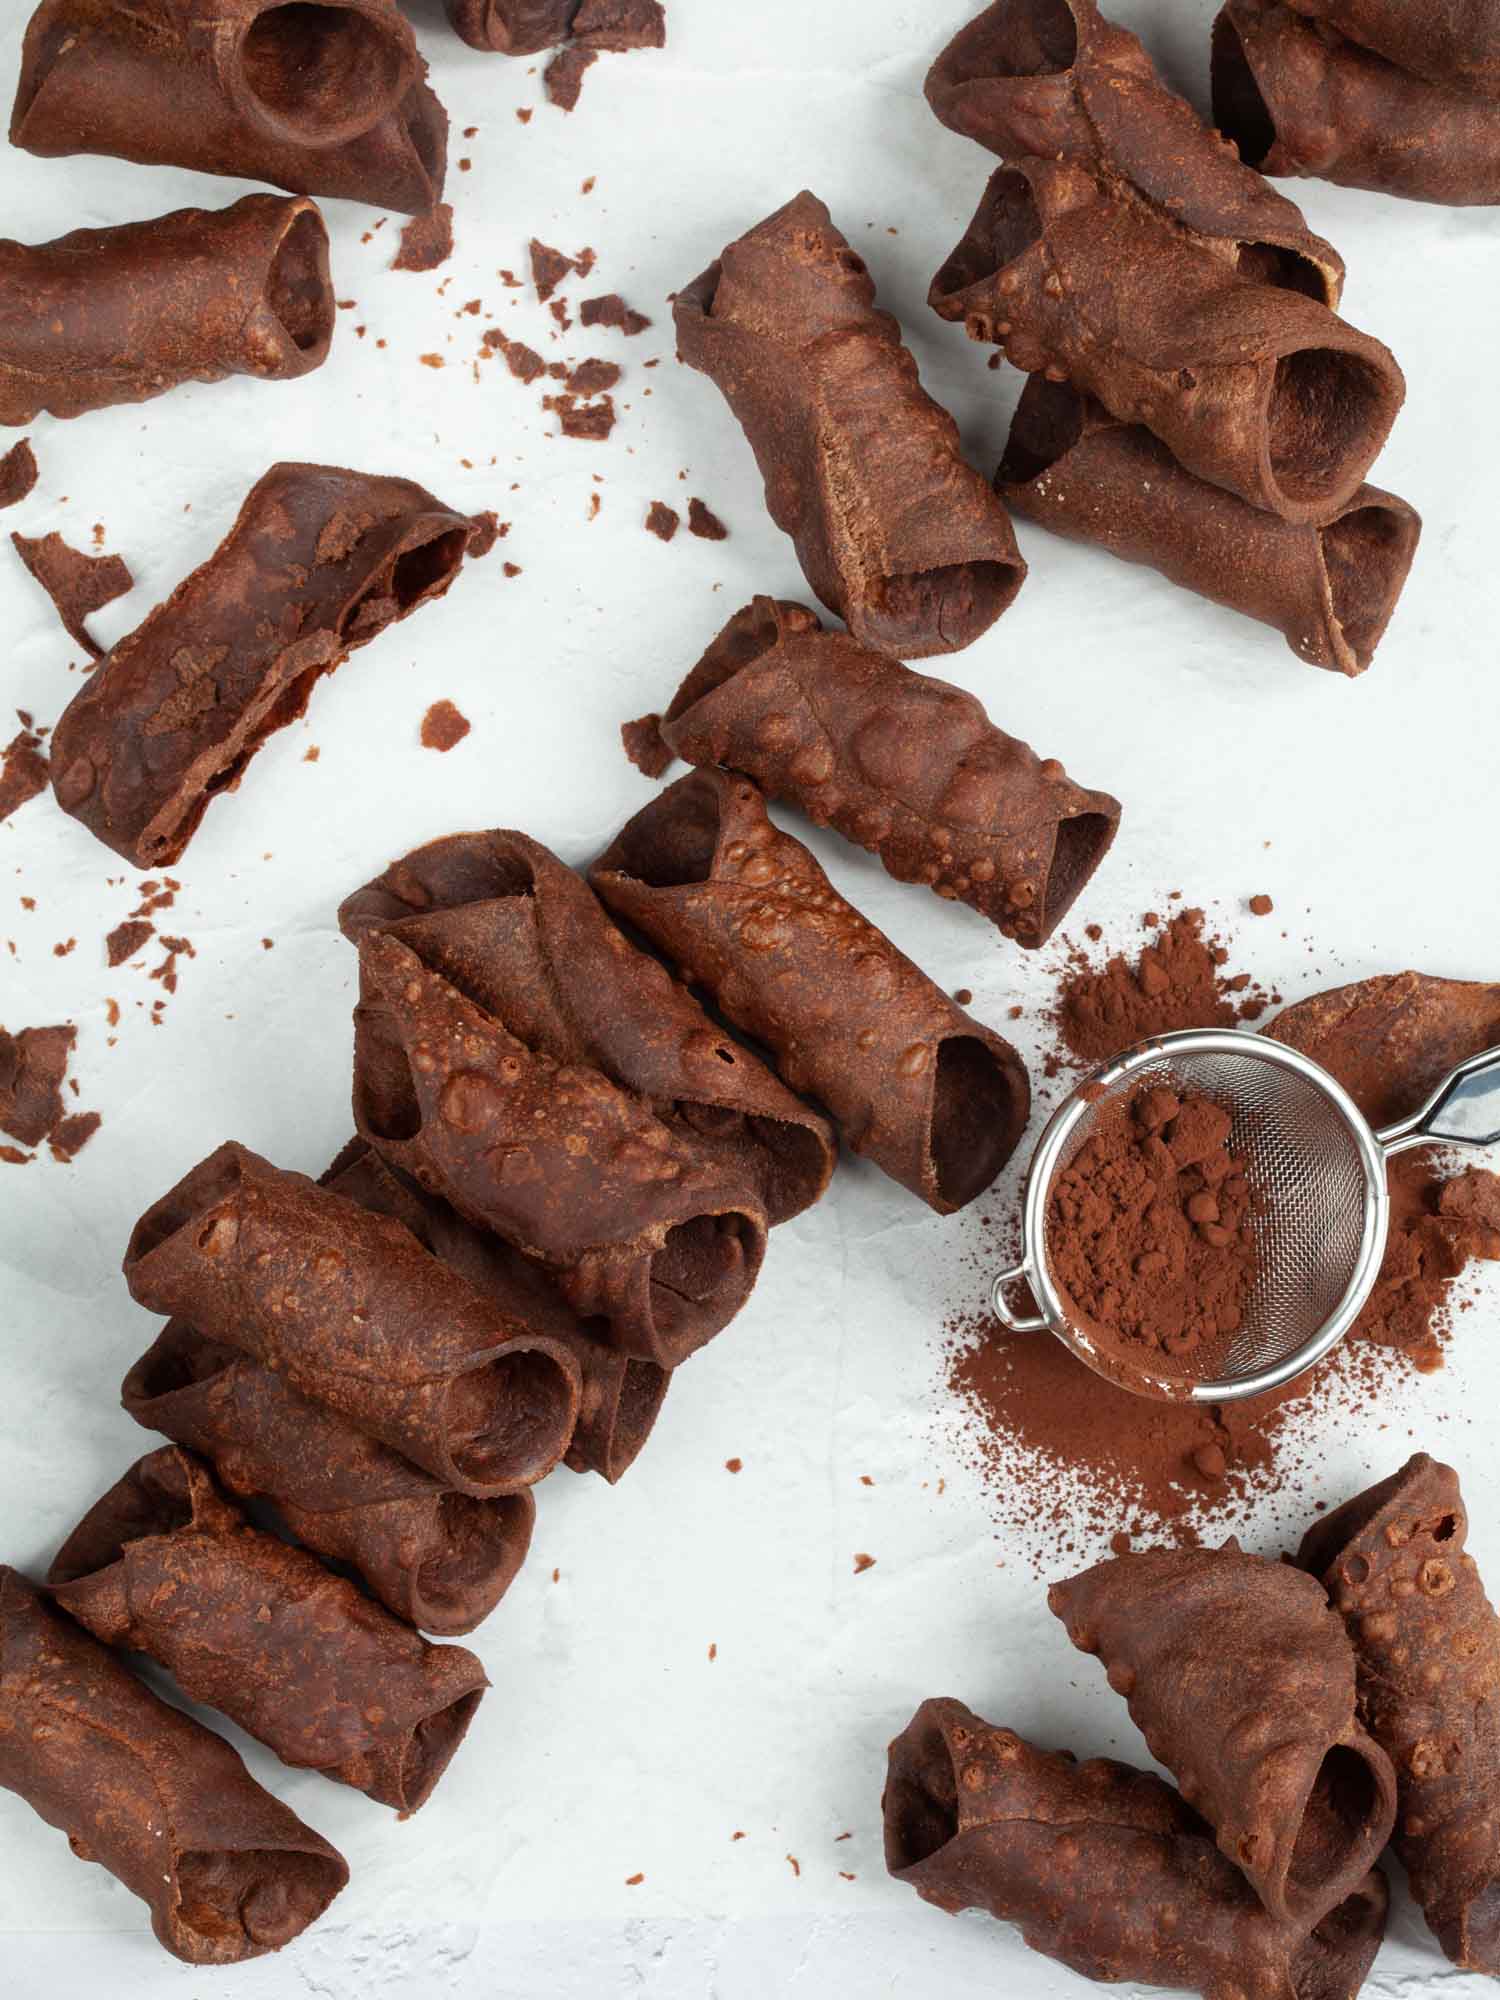
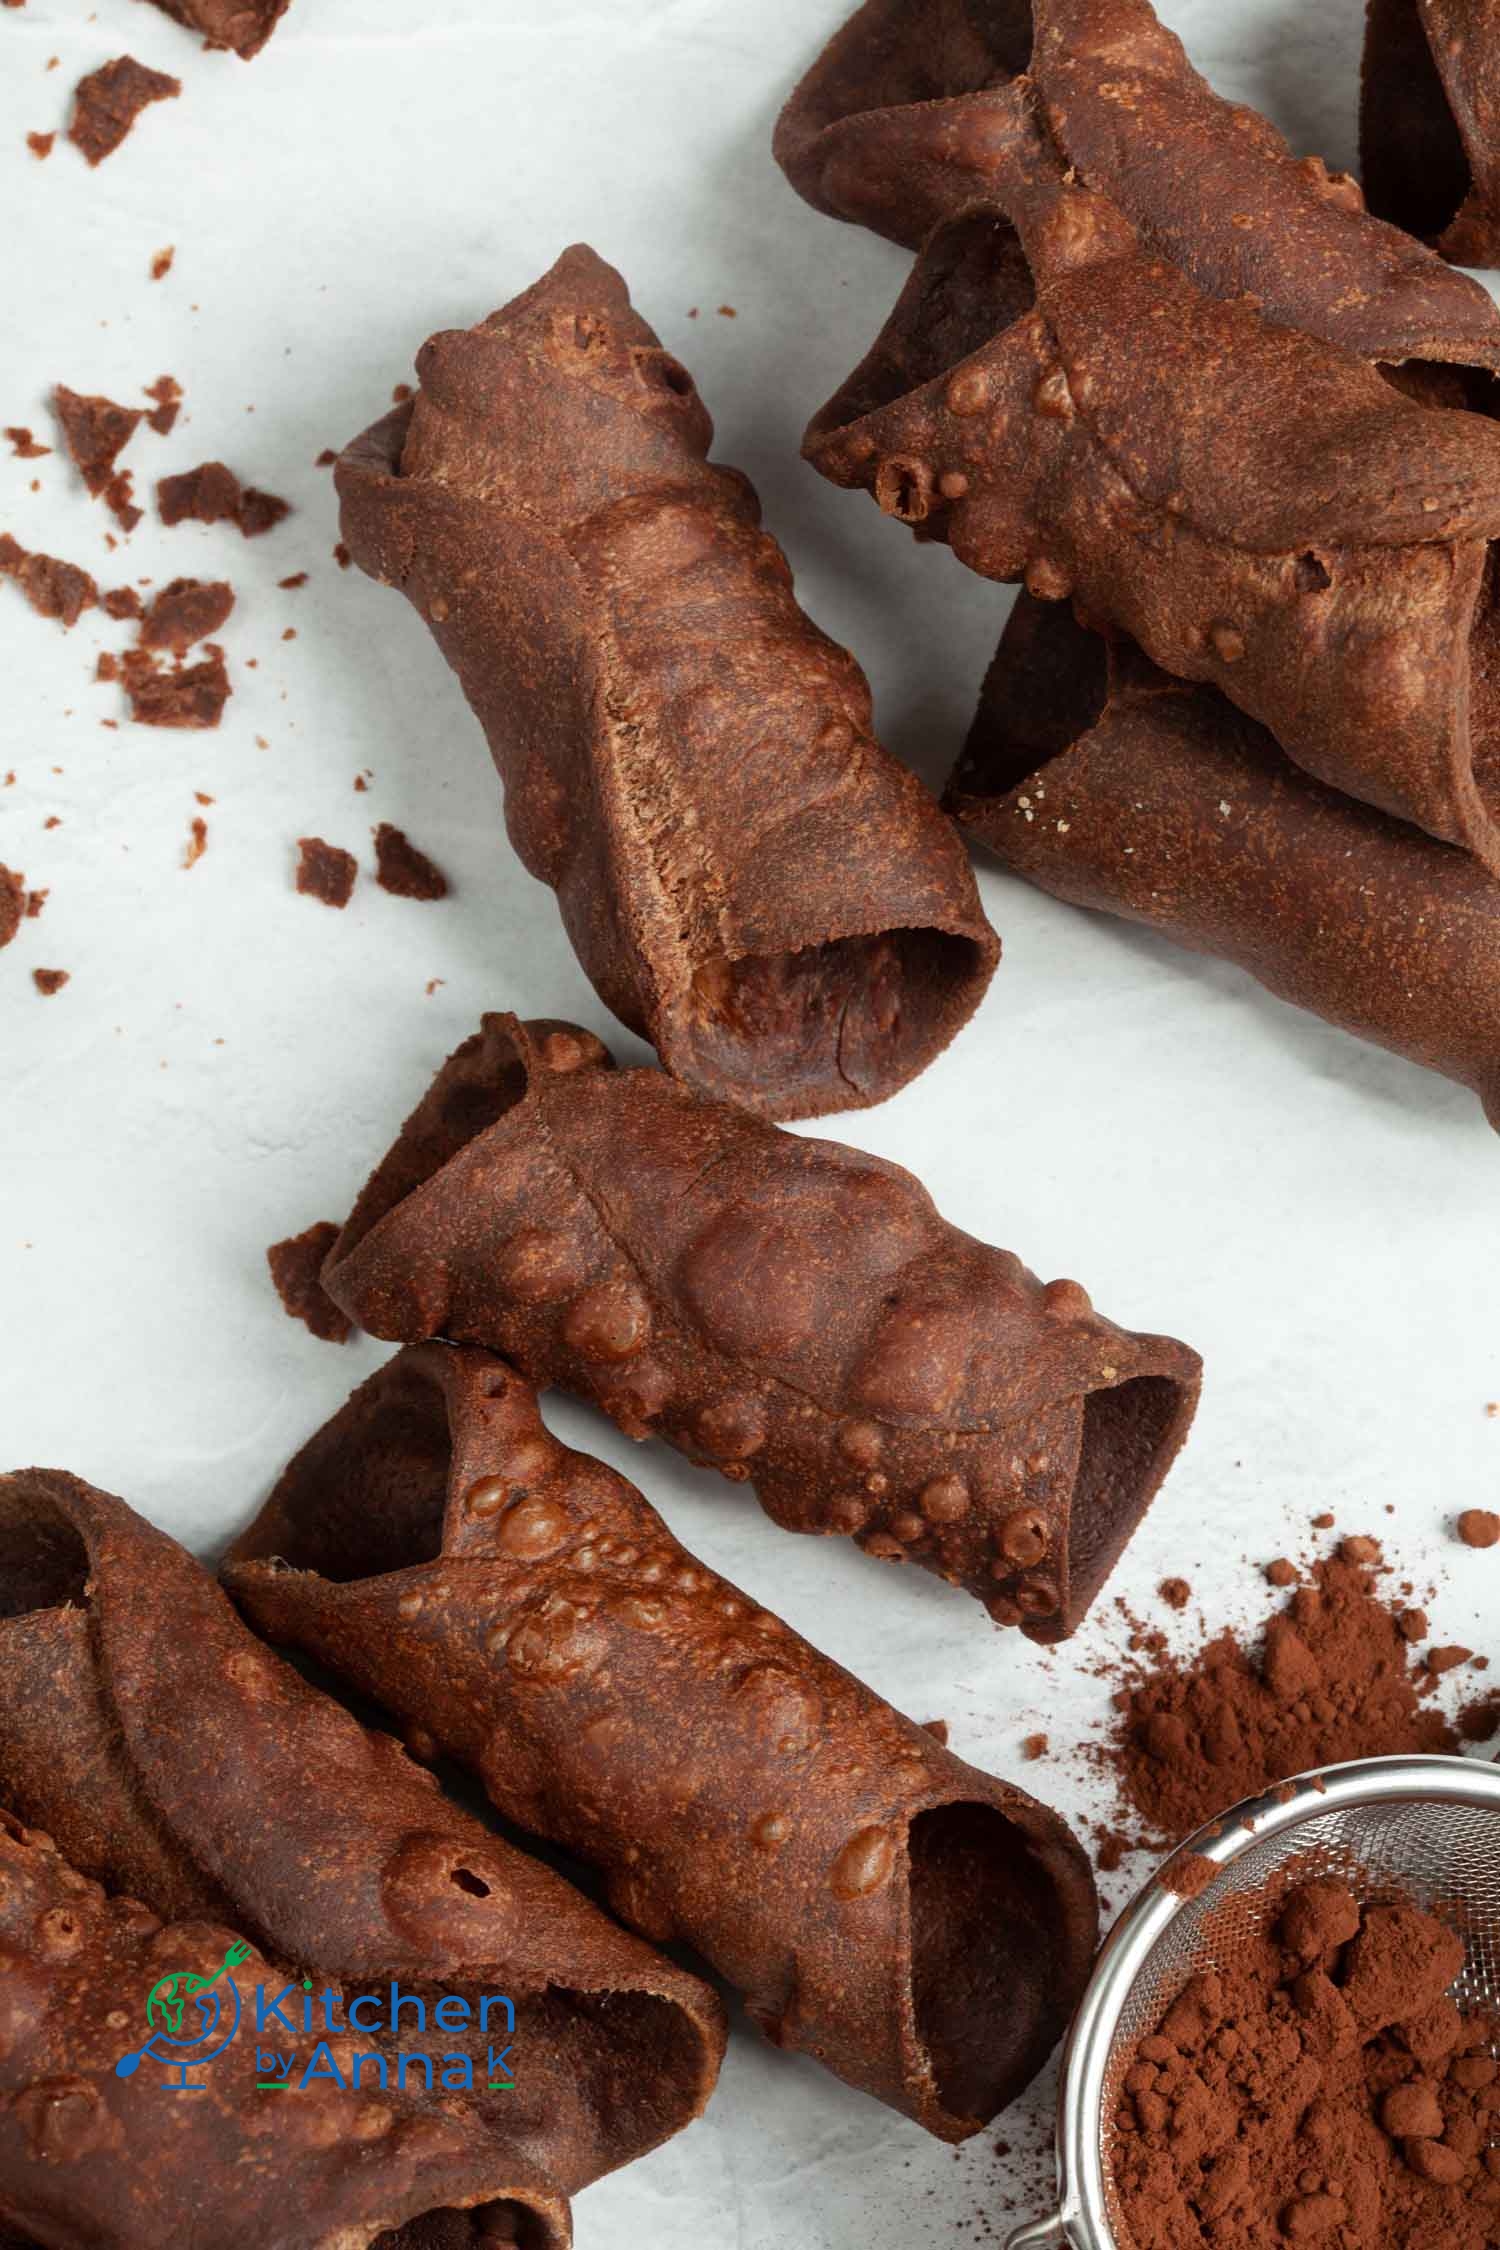
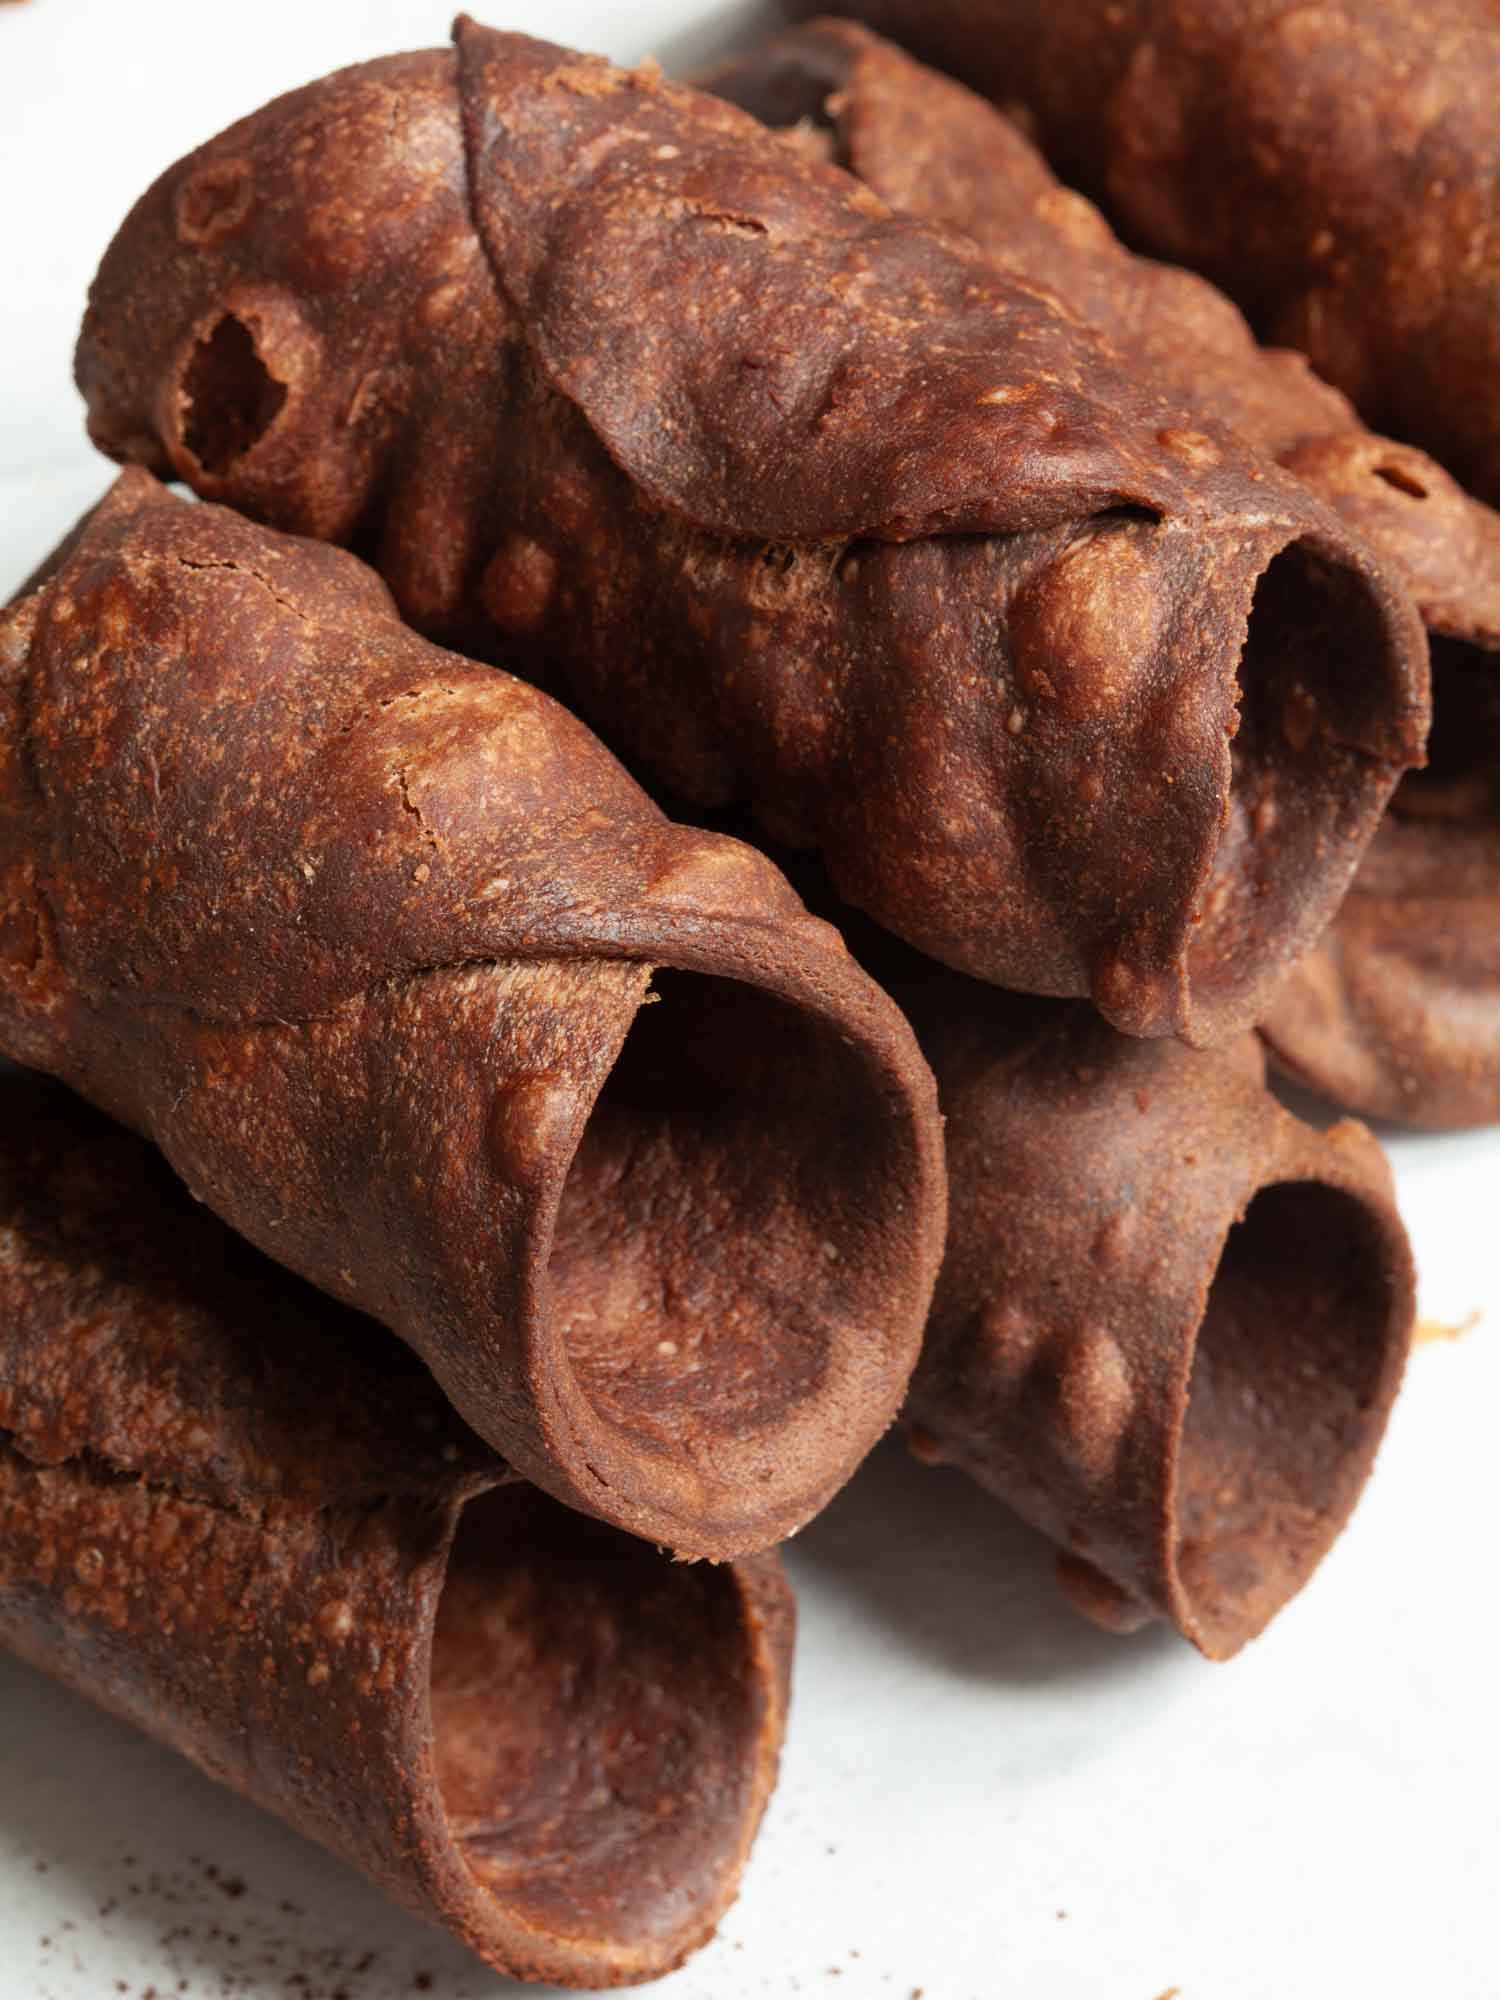
A good cannoli shell has to be crispy and have lots and lots of small air bubbles that burst as you bite into it and my cannoli shell has it all. These cannoli shells taste very different from a standard cannoli shell. They are a little bit bitter, due to addition of a cocoa powder. The flavour is more sophisticated.
I decided to make cannoli shells flavoured with cocoa as I got a few ideas for cannoli fillings with chocolate. Cocoa shell and a chocolate filling? Yes, it is a great match. If you have not tried it, here is my recipe for Baileys and chocolate Italian cannoli. The flavour was divine. If you are a big chocolate lover you absolutely need to check out chocolate cannoli.
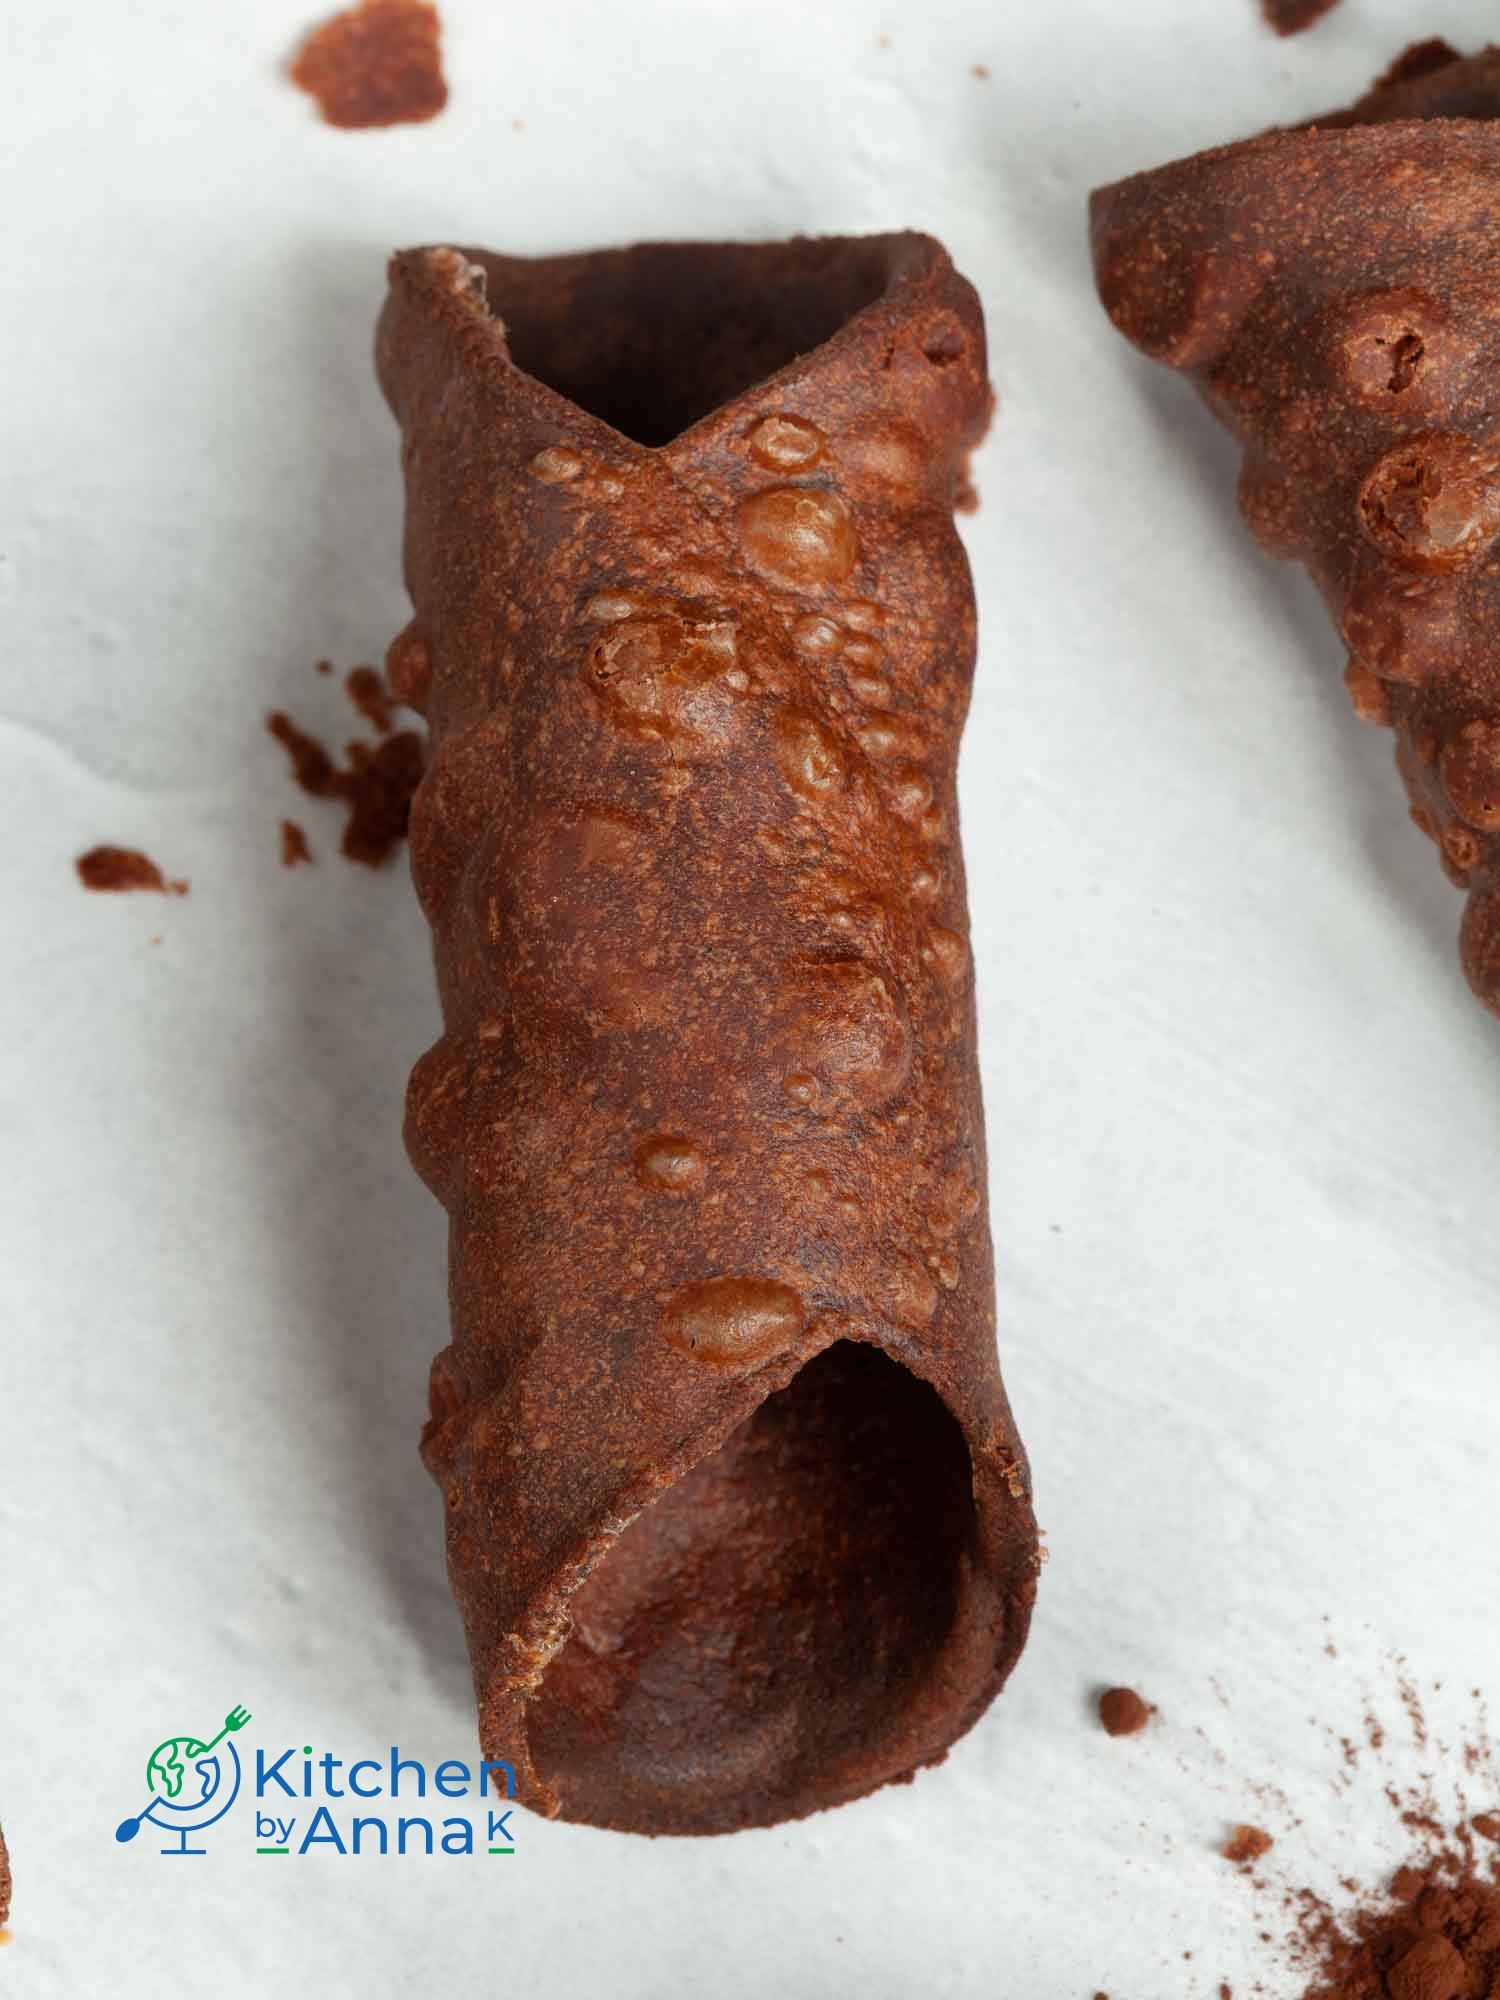
If you are thinking about making cocoa cannoli shells, this recipe will not disappoint you. Just look at these delightful air pockets, the color and texture.
These homemade Italian cocoa cannoli shells can be made in advance and kept in an air tight container for up to two weeks.
If you are looking for more cannoli recipes, I can recommend you the following:
Homemade Italian cannoli shells
Baked ricotta cannoli cheesecake
Eggless ricotta cannoli cookies
I hope you will make my recipe and if you do, please leave a comment below and let me know your feedback. You can also find me on social media such as Facebook, Instagram, Pinterest, Gab and Gettr. Please say hi and do not forget to tag me in if you make my recipe. I love seeing your creations.
Recipe source – adapted from my other recipe for Homemade Italian cannoli shells
Buon appetito!
Homemade Italian cocoa cannoli shells
Crispy, light and flaky homemade coca cannoli shells.

Ingredients
Instructions
-
Add flour, cinnamon, salt, sugar, cocoa powder and butter into a medium bowl, mix well.
-
Add egg and marsala wine and mix until all ingredients are fully combined.
-
Transfer the dough on a working space and using your hands knead the pastry dough until it becomes unified and no crumbs are remaining.
-
Now, it is important to work pastry dough for at least 10 minutes and while doing so, cut pastry dough into smaller pieces and knead together again. Repeat the process couple of times. The purpose of this step is to incorporate as much air in the pastry dough as possible so we can get lots of bubbles on the cannoli shells.
-
When pastry dough is ready, let it rest for at least 2 hours or even better overnight.
-
When you are ready to make your cannoli.
-
Prepare metal tubes, working surface, egg white, flour for dusting, a round cookie cutter or a glass
-
Cut out circles from the pastry dough and roll each pastry dough into an oval shape. This step will help to create this famous cannoli shape.
-
Wrap the oval dough loosely lengthwise around a cannoli tube.
-
Brush one end of the dough with egg white and then press the other end of the dough on top. Make sure you seal it well so the dough does not 'open up' while frying.
-
Preheat your oil in a deep pot until it reaches 175°C. It is important to get oil to this temperature otherwise cannoli will not fry properly.
-
Depending on the size of your pot, carefully place about 3 or 4 cannoli in the pot.
-
Fry each cannoli for about 2 min until dark golden brown.
-
Remove cannoli on a paper towel and let them cool down before removing the metal moulds.